Editing The Render and Material
STEP 8.
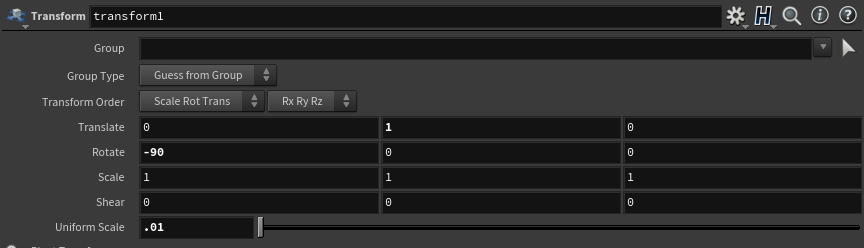
First we’re going to fix the size of the crow. It’s way too big now obviously which will cause us problems when we want to make a particle effect. So go back to Houdini and go into the geometry node of the crow. In there we’re going to edit the transform node. We want the crow to be significantly smaller, so edit the Uniform Scale to 0.01. Also move it 1 unit up in the Y translation.
Now go to the Vertex Animation Node in the ‘out’ network and hit Render again. This will override the previous files.
Go back to Unreal Engine. Select the position texture and the mesh, right click and click on ‘Reimport’.

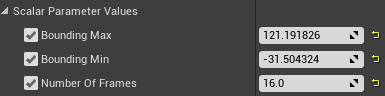
The mesh should look completely broken at this moment. That’s because the values BBOX MIN and BBOX MAX have changed. Go into the material instance to change these to what Houdini changed them to. Again, you can find these values in the Vertex Animation Textures node in Houdini. Everything should work again after this.
Now we’re going to edit the material to: 1. Make the crow look more appealing and as it was intended to look, and to: 2. Add some nodes that will make our life easier once we’re creating a particle effect.
STEP 9.
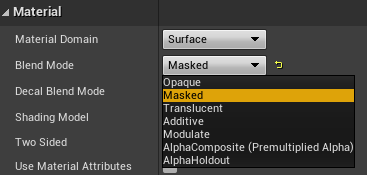
The crow is missing a lot of detail in its opacity right now. This is especially apparent in the feathers, where you can’t see single cut out feathers, but a big straight piece of mesh. To bring back this detail, we only have to change two minor things in the material. Open up the original material (not the instance). In the Details panel on the left, change the Blend Mode of the material to Masked. This way, we can use alpha textures to mask out certain parts of the mesh, so they appear invisible.
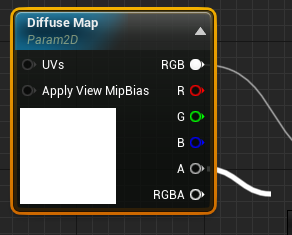
Next, connect the A channel of the Diffuse map that can be found in the material you pasted from Houdini to the Opacity Mask output that just appeared in the output node.

The color texture you added to the material instance a few steps ago already has an Alpha channel, which contains a mask for the crow. This means that if you check your mesh now, it should have updated and this is your result:
How a masked material works is it reads the alpha texture and masks out the parts of the mesh that are black according to the UV map, and shows everything that is white.
STEP 10.
Now we’re going to replace a node in the material. This is the ‘Speed’ parameter ad shown below.
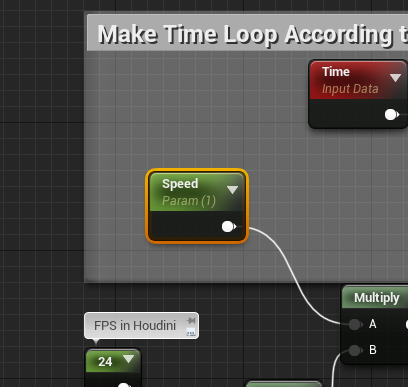
Remove it and istead place down a DynamicParameter node. Connect the first output tot the A input of the multiply node. On the left in the Details panel, name the first parameter something like “AnimationSpeed”. Doing this, ensures that we can edit this parameter in the particle effect.
