Using the Animation’s in a Particle Effect
Now we’re going to create the particle effect. Feel free to let your own creativity flow in this final step. I will show you the values I use for certain parameters and my proces of creating an effect, but this is just an example. Bring the effect to wherever you want it to go.
STEP 11.
Create a new particle effect and go inside it. The first thing we’re going to do is edit the existing emitter into a mesh emitter and hook up our Crow mesh. Right click somewhere on the emitter, go to Type Data en choose ‘New Mesh Data’.
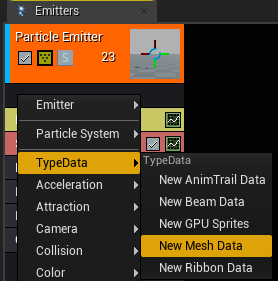
Then click on the module ‘Mesh Data’ that just appeared and hook up your mesh on the left in the details panel.

The size of the crows is quite big. Go into the Initial Size module to make them smaller.

Now, let’s give the particles that appear some velocity to visualize how many there actually are. Go into the Intitial Velocity module and crank up the values that appear on the left in the details panel. These can be whatever you want to be, but mine are shown below in the picture.

The lifetime is quite short, so I put that tot min: 2.5, max: 3.5. Note that it’s not always smart to randomize your lifetime, because you can end up with way more particles on your screen than you actually want, but for this effect, I want the crows to disappear at random moments, so it looks a little more dynamic.

Now that we can easily see the amount of crows on our screen. It’s time to edit the Spawn module. We don’t want the crows to spawn continuously, so we’re going to add ‘Bursts’. Go into the ‘Spawn’ module and set the spawn ‘Rate’ to 0. The, add a few bursts to your Burst List below. I pressed the + sign four times, so I have four bursts.

I want the crows to appear in big numbers, that quickly decline in the following bursts, so it looks like some crows are naturally flying behind the others. Open the first one. Edit the count, so crows start spawning again. The Time will stay at 0, because I want the first burst to be instant. Next, you can edit the next bursts, these will have a lowe count and a highter time with every next burst. This is what I went with, but feel free to fill in whatever you want.:
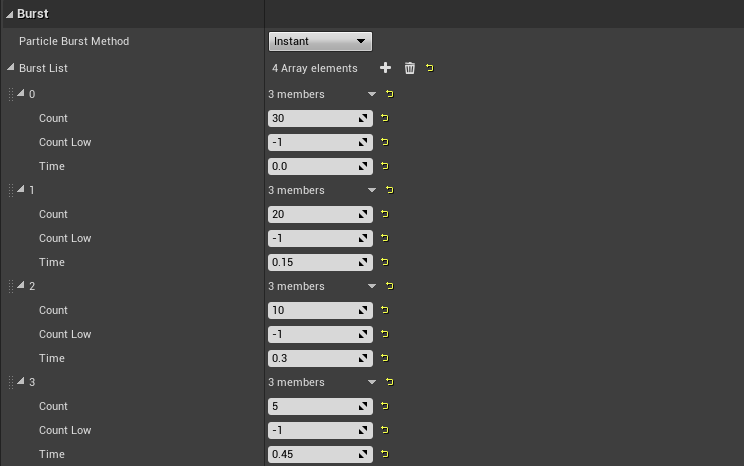
The bursts will now keep appearing. This is because our emitter loops are endless. We’re going to change that in the ‘Required’ module. Click on the module and scroll down in the details panel. There you will find ‘Duration’. Change the ‘Emitter Loops’ to 1.

Now the crows will stop appearing after one loop. To see your effect again, simply press the space bar.
So, the crows are flying, which is awesome, but it looks a bit static. We’re going to fix that by adding that parameter we created in the material. Right click on the emitter, go down to ‘Parameter’ and click on ‘Dynamic’. Alternatively you can also type ‘Dynamic’ after right-clicking without having to search for it in the list.
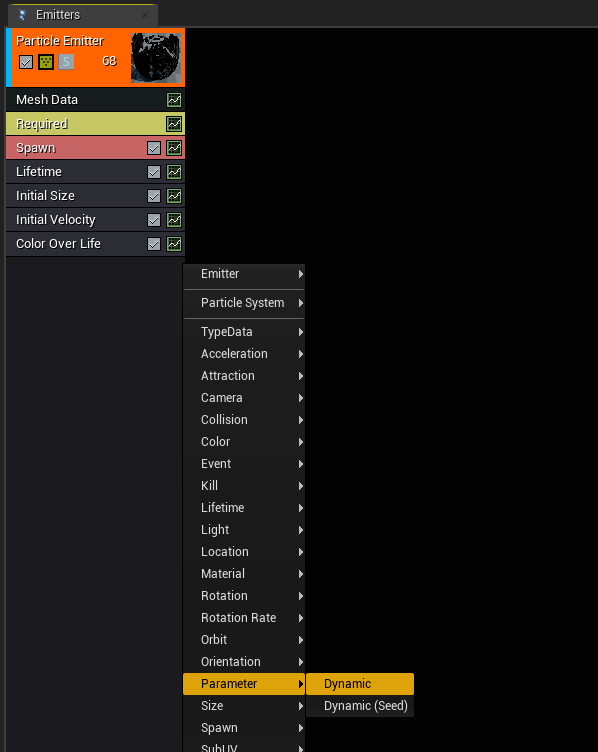
If you look at the Details panel on the left, you can see that at index 0 of the array of parameters, the Param Name is “None”. This is inaccurate, because in the material editor we gave it the name “AnimationSpeed”. For the module to properly update we have to left click on the module and then click ‘Refresh Module’.
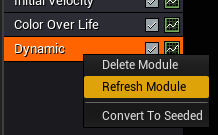
Now the name of the first parameter should be updated.
Before we’re going to change the speed. We have to tick the ‘Spawn Time Only’ box, otherwise the particles want to update the speed every frame, which causes very jittery weird movements and not at all what we want to achieve.

We want to animate the speed of the birds flying animation, because when birds take flight, they move faster, than when they are already in the air. For this we have to change the Distribution of the parameter to ‘Float Uniform Curve’. Why we want a uniform curve is because we want the wings of the birds to move at different speeds, so it doesn’t look like they’re all synchronized like right now which is not very realistic.
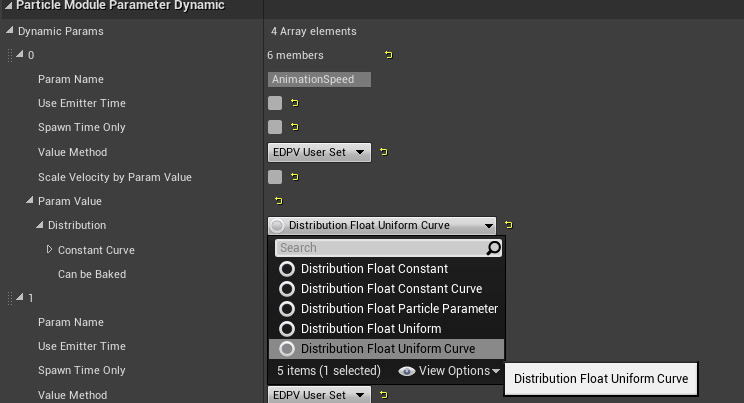
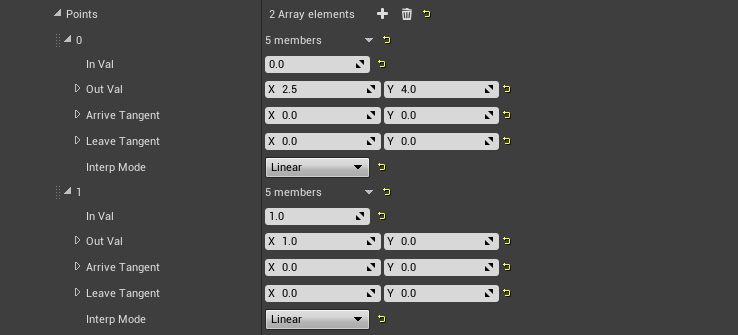
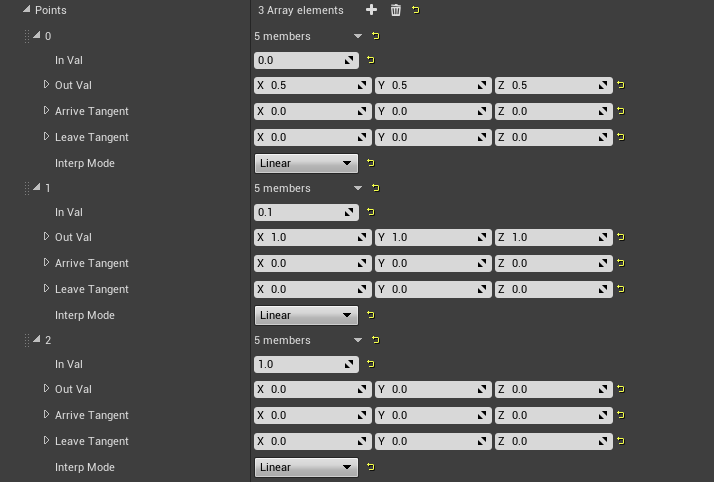
In the point array that appears, I add two points. The first point is the speed range that the bird have when they take flight and the second point is the speed range that the bird have at the end of their particle lifetime. I put in the below values:
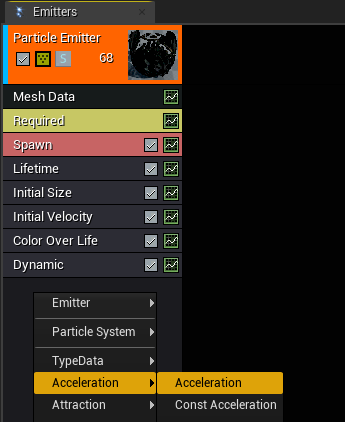
Next, I want to give the crows some acceleration in the Z direction, so they go higher over time. I added an acceleration module to my emitter.
I kept the Distribution to Vector Uniform and gave the Max Z a value of 500. This way there will also be birds that don’t have as much acceleration, so it will look very spread out.

We’re goin to add one more module to edit the movement of the crows. This one is called ‘Orbit’. It allows for offsetting and rotating the particle from the actual particle position. Add the module. I gave a slight offset to the crows with the following values, but feel free to play around with it. This can make the movement of the crows really interesting.

Lastly, I want the birds to disappear, without them suddenly popping of my screen. For this, I’m using the Size By Life module.
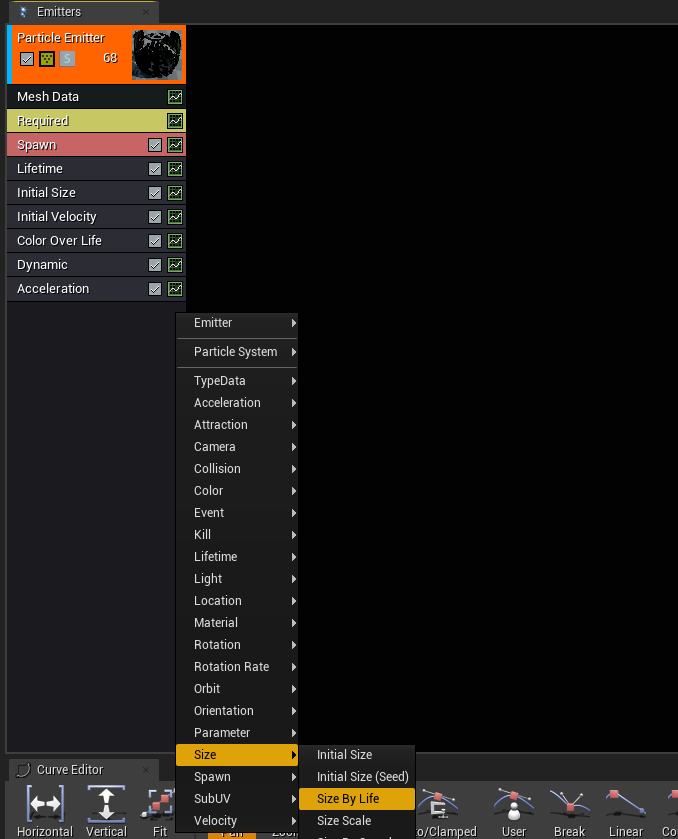
I want the crows to be a bit smaller when they appear, then be big very quick, and reduce in size again over time. These are the values I went with:
That’s it for now. This is the result of the particle effect: